Joanna Campbell Slan has moved, searching new blog...

Showing posts with label recycling. Show all posts

Friday, October 17, 2014

Excerpt from Kicked to the Curb (Book #2 in the Cara Mia Delgatto Mystery Series)


By Joanna Campbell Slan


From the press packet —
The Treasure Chest Philosophy: Even the humblest items (aka “trash”), despite their origins or their prior usage, have value.

Chapter 1
Mid-January
7:45 a.m. on Thursday
The Treasure Chest in downtown Stuart, Florida
~Cara~

“We’ve got a problem,” said Detective Lou Murray, of the Stuart Police Department. His bulk filled the threshold of the back door to my store, The Treasure Chest. With the bright sun behind him, I couldn’t see his expression, but the tone of his voice was ominous.
             “What’s up, Lou?”
The big cop has gotten into the habit of dropping by most mornings. He claims this is part of an initiative to make police presence more visual in our picturesque downtown.
But I know better.
Lou is head over heels in love with Skye Blue, my friend and part-time employee. She’s also my tenant, renting one of the two apartments upstairs, while I live in the other, its mirror-image twin. I glanced over to see that Skye was busy in the sink, bonking around a couple of mugs and the water carafe for the coffee maker.
Drying her hands, Skye hugged me. “How’d you sleep?”
            I did a so-so motion with my fingers.
            “Cara? I need ten minutes of your time,” said Lou. As he spoke, he only glanced at me. He kept looking out the window of my back door.
“Right now? My dog needs to go outside, and I haven’t had my morning jolt of java. I am not fully human until I have my coffee.”
“Right now,” said Lou, firmly. “I need you to look at a car parked behind your grandfather’s gas station.”
“Let me guess. Today’s the day they start jackhammering that old pavement around the Gas E Bait, right? And the car is in the way? Just tow it,” I said. “That’ll teach the owner a lesson.”
“Not that simple.” Lou frowned as he ran a hand through his cropped hair.

Chapter 2
~Cara~

“I’ll take Jack,” said Skye, reaching for my rescue pup and tucking the white Chihuahua under her arm. She, Lou, and I had made it to the back stoop when MJ Austin pulled up in her pink Cadillac.
            “Morning,” said MJ. She is a full-time employee of The Treasure Chest, a real find because she used to work for the previous owner.
 “Good morning,” I said to her. “Lou wants me to take a gander at the car parked behind Poppy’s gas station.”
“Shouldn’t be there,” said MJ.
“Right,” Lou muttered.
We had just crossed the alley that separates the parking spaces behind my store from the parking spaces behind the gas station when a truck pulled up, a black Ford F150. A tall man in an orange tee shirt stepped out of it. Sunlight glinted gold on his hair, a long surfer cut that brushed his collar. His eyes were a mystery behind his Wayfarer sunglasses. He glanced at us and then toward the parked Toyota.
 “And you are?” Lou asked the newcomer.
“Jason Robbins. Project manager for Fill Up and Go corporate.”
 “Detective Lou Murray and this is Cara Mia Delgatto,” said Lou, flashing his badge. Skye and MJ hung back a few paces.
 “You’re exactly as your grandfather described you,” Jason said to me. He smelled of sandalwood and soap as he shook my hand.
“Cara, have you ever seen this car before?” Lou asked, as he used his hand to shade his eyes against the morning sun. “Take your time looking it over. But don’t touch it.”
I stared at a rusty Toyota with balding tires.
“Why don’t you just run the plates?” I wondered.
“Answer my question, please,” said Lou.
The vehicle looked familiar. I took two steps to the left, blinked in the glare of the sunlight, and looked closer. The giveaway was a dog-earred paper sign sitting in the back window. It said SHORELINE NEWS.
“I’m pretty sure that car belongs to Kathy Simmons. She’s a reporter for the Shoreline News. Her roommate has been calling the store for three days. She says Kathy’s been missing. Is that true?”
 Lou didn’t answer my question. Instead, he frowned. “Anything else that helps you identify the owner?”
I moved even with the rear passenger door. A rotten breeze had kicked up from the ocean. A lot of dead fish must have rolled up with the tide.
Cupping my hands over my face to block out the bright light, I stared inside the car. A plastic food storage container rested on the back passenger seat. Next to it was a white shopping bag.
"That's definitely one of my new shopping bags," I called over my shoulder to Lou. Skye and MJ stood a few feet away from him. MJ had her arms crossed over her chest. Skye was shuffling her feet. Neither looked happy.
I continued, "Kathy bought a picture from me the night of our media event. I put her purchase inside a bag like that one. MJ packed up leftovers for Kathy to take home. The container looked like the one on the seat. It was late at night and raining when I walked Kathy to her car, so I didn’t get a really good look, but I’m almost positive this is her vehicle.”
“Let me make sure I’ve got this straight,” said Lou, and his frown deepened. “Four days ago, Kathy Simmons attended your media event.”
“Right. We invited all members of the local media to come and preview our Old Florida Photo Gallery exhibit. Served them food. Gave them press packets. Let them wander around the store. Answered their questions. Kathy Simmons came on behalf of the Shoreline News. Her editor came too, but he left early.”
“Had you ever met her before?”
“No.”
“Tell me about the event,” said Lou.
“It started at seven in the evening and ended at eight. A dozen reporters came. I gave a little spiel about our mission to recycle things and be creative with found objects. I showed them old black and white photos we’d framed and mounted in refurbished frames. The three of us—MJ, Skye, and I—played hostess.”
“What was Kathy Simmons wearing?”
That was easy. “A weird vinyl raincoat printed like newspapers. Oh, and a headscarf. Before we went outside, she pulled the scarf out of her pocket to cover her hair. It was raining on Monday night.”
“What else can you tell me?” he asked in a serious tone. “What happened immediately before you two walked to her car?”
“What do you mean?” I couldn’t hide my surprise.
“Is it true there was an altercation?”
“W-w-what?  How do you know that?” My mouth went dry.
Skye was studying the pavement. Her shoulders slumped in defeat.
“Let me summarize,” said Lou. “You had an event for reporters. Kathy Simmons came. You two had words. You walked her to her car—and now she’s been missing for three days. Is that right? Today her car shows up in a space behind your grandfather’s gas station.”
 “U-u-uh,” I stuttered, trying to think of what to say.
Skye shook her head sadly. She mouthed one word at me, “Sorry.”
MJ rolled her eyes. “Cara, quit answering his questions and call a lawyer.”
 “Y-y-you can’t seriously be suggesting that I had anything to do with Kathy’s disappearance!” I looked from Lou to the Toyota and back to him. “You’ve found her car. She has to be around here somewhere.”
“Maybe,” said Lou.
 Jason crossed his arms over his chest and studied me solemnly.
“Ladies, go back to your store,” said Lou. “Cara, I’ll talk to you later.”
“Why? First you drag me out here. Then you accuse me. Now you want me to go inside and wait? I am not your puppet, Lou.”
There it was, the terrible temper that’s gotten me in trouble my whole life. I should have turned around and left Lou to it. But after the grilling he’d given me, the last thing I wanted was to follow his suggestion.
Lou reached inside the pocket of his navy blue blazer for a pair of latex gloves. “Have it your way.”
The detective moved closer to the trunk. The top was slightly ajar; the locking mechanism hadn’t caught.
Pulling an ink pen from his pocket, Lou tucked it under the hood of the trunk and lifted. It opened with a squeal of surrender. A foul stench rolled out.   
Involuntarily, Lou took a step backwards. When he moved, I could see inside the trunk.
Kathy Simmons stared at me with dull, dead eyes.


To buy your copy of Kicked to the Curb, go to http://tinyurl.com/kttcurb  Or visit Joanna's page on Amazon http://tinyurl.com/JoannaSlan

Tuesday, October 7, 2014

Giving in to my Inner Scrounger

My Beta Babes and I went out to eat at Pasta House in St. Louis.

I tried to behave, really I did. We had a great lunch and fun talking with each other.

But I started lusting after the plastic butter tubs. And the margarine containers. I kept imagining ways I could use them.

Then I said to myself, "What will they think of me if I start collecting trash?"

I decided, "I don't care. That's who I am. That's what I do. Either they like me for myself or not."

So I asked the person next to me for her empty margarine containers. She kindly handed them over. Soon everyone was handing me empty plastic containers. I filled my purse with them. One of the husbands tried to give me the rest of the full tubs in front of his place. (Bless his heart. He was so sweet. I had to explain that the butter wasn't the point.)

I carefully cleaned them in my hotel room, packed them in a box, and had them mailed to me with a bunch of other supplies.

Last night I began putting together a kitchen cabinet from a kit. As usual, I modified the kit a lot. The way they were constructing the sink was silly. It wouldn't look good!

Then I remembered my margarine containers.

One of them worked perfectly.


I am so glad I gave in to my inner creative scrounger. Yes, I was a bit embarrassed by my greed for garbage. But if I hadn't have asked, I wouldn't have had the butter tubs for my project. I also wouldn't have saved those tubs from the recycling bin.

And I wouldn't have been true to myself. I would have pretended to be someone I'm not. I'm not too proud to ask for what I need.

How about you? What crafting supply do you find impossible to resist? When have you embarrassed yourself for the sake of a craft?

Wednesday, September 17, 2014

Love, Crafts, and the Fine Art of Dumpster Diving

Two days ago, I noticed a big red Dumpster behind our apartment complex. It looked to be empty.

That's interesting, I thought.

Yesterday evening, my husband and I were walking Jax when I noticed the Dumpster had been filled to the brim. Looks to me like the apartment management evicted someone, sending their furniture packing as well. A red sofa extended above pieces of wood, paper, and articles you'd have to examine closely to identify.

That made me sad. Once upon a time, a bank threatened to evict my mother, my sisters, and me. I don't think that any of us will ever forget that bleak period in our lives.

Then it made me wonder. Was there any good that could come out of this ugly situation? While I was pondering this, thinking deep thoughts, David and Jax kept walking. "Honey?" called my husband. "Come on. Leave it alone."

He knows me too well.

Because by then, I'd decided to investigate. I climbed up on the ledge surrounding the big red trash container. I'm short so I couldn't look deep inside, but I did see a piece of board sticking out. A big piece of wood.


Big enough to serve as a base for my dollhouse and the potting shed.

Big enough and sturdy enough that I wouldn't have to go to Home Depot and buy a piece of plywood and pay for them to cut it to size.

Big and free.

Even freer after I tugged it out.

David, I must confess, was mortified. He started walking in the other direction with body language that clearly stated, "I don't know that woman!"

I tugged and tugged. I had to reach in and move a couple of other boards around. Luckily for me, I've kept up with my tetanus shots, because that big piece of wood had nails sticking out. But once I began to extricate it (classy word for trash-picking, eh?), I was determined that it would be MINE.

David didn't offer to help. Instead, he said, "Oh, honey..." in that tone of voice that means, "I love you, but right now, I would cheerfully pretend we aren't married."

So I dragged it home. I do mean drag, because it's heavy. I put it in the spare bedroom. I waited until today when David's at work. I hauled it out. Knocked down the nails. Pried off a half dozen small squares of excess wood that served as braces. Put it up on our kitchen island. And started making plans. BIG plans for my dollhouse.


The way I see it, I saved something from the landfill, I saved money, and I'm moving ahead with my crafts. Next time I walk past that Dumpster, I might just vault over the side and poke around a little more.

Have you ever been Dumpster Diving?

Tuesday, September 16, 2014

Kiki Lowenstein and the Penny Pincher (Part 3)

By Joanna Campbell Slan

Editor’s Note: In Parts 1 and 2, Kiki Lowenstein, owner of Time in a Bottle, has been teaching a two-session class called “The Double-Dip.” This week, her customers brought in one of their favorite dessert recipes, a photo of the dessert, and the recipe to use in an 8- by 8-inch cookbook album. There's a bit of friction in the group because Iona Lippman and Lisa Ferguson both claim to make an outstanding red velvet cake—and now Iona's recipe has gone missing! To make matters worse, Kiki's customers have also challenged her come up with thrifty ways to scrapbook. Kiki has her hands full with this group. You can read Part 1 here http://tinyurl.com/pennypinchpart1 and Part 2 here http://tinyurl.com/pennyp2

Iona threw up her hands and kept screaming. "Where's my red velvet cake recipe? Who took it? Someone stole it from me!"

"Calm down," I said, making placating motions with my hands. "It has to be around here somewhere, Iona. You know how things get covered up by papers. Or they get swept off the table inadvertently. Let's not go accusing anyone of mischief."

With that bold pronouncement of my faith in human beings, and scrapbookers in particular, I put myself in a ticklish spot. The burden of finding her recipe card now rested squarely on my shoulders.
For the next 30 minutes, we tore the class area apart. All of the classmates participated in the treasure hunt. We went through piles of paper, one sheet at time. We looked in the copier. We opened the paper bags I had taped to each cropper's work space. I even got down on my hands and knees and crawled around on the floor. When the recipe card didn't show up, I expanded our search area. When I bought Time in a Bottle, we didn't have enough space for our classes. The display shelves took up all the available room. To make enough space for our sessions, I'd put those same display shelves on wheels so they could be rolled to one side. Now, I rolled the shelves this way and that, scouring the store for the missing 3- by 5-inch card.

"You don't understand," said Iona, with a hitch in her voice. "That recipe has been in my family for generations. We've passed it down from mother to daughter. I can't go home without it. I just can't!"
She started howling with misery, while her friend Avery Ailes patted her consolingly on the shoulder.
Clancy sidled over to me and whispered in my ear, "You can’t win. You realize that, don't you? If you search each of our customers for the card, you're admitting someone probably took it. If you don't, you're letting someone walk away with Iona's recipe. Either way, people are going to be mad at you. They'll talk about this, and they'll take it out on the store."

My friend was right. And I had no idea what to do next.

"How about if I share a few thrifty ideas for albums?" I said, in an overly perky voice. "Let's give ourselves time to think. Maybe the recipe will show up. In fact, I'll even offer a sweetener. The person who finds the recipe will get a $50 gift certificate to the store."

Yes, it was a lot of money, but I was desperate to save my store's reputation. The potential bribe worked. The women all took their seats and listened intently.

"We all know how expensive albums can be," I said. "And normally I'd be the last person discouraging you from buying a pricey album to showcase your prized family photos."
At that, my customers chuckled.

The sound relaxed me just a little, and I continued, "Sometimes you aren't scrapbooking to create an heirloom. In the immortal words of that wise woman Cyndi Lauper, 'Girls just want to have fun,' right? Having fun doesn't necessarily mean you need an expensive binder for your layouts.”

"There are a lot of other ways you can collect and display your photos.” I described and displayed many examples. “A child's board book—use sandpaper to scuff up the shiny pages. That'll make gluing new paper over them much easier. Catalogs and magazines—glue together 4 or 5 thin pages, cover these with nice paper, and decorate them. Paper bags—stack four lunch bags on top of each other, alternating the open side. Fold them in half. Open them up to reveal the fold line. Stitch them together at the fold line. Fabric—Cut pieces of pre-washed cotton fabric in a 12- by 12-inch size or larger. Stack them and sew them together down one of the edges. Cover that edge with bias binding. Glue your photos directly onto the material. Toilet paper roll cones—flatten them, stack them, and punch holes in one of the short ends. Thread them together with ribbon or a metal ring clip. Each cone can act as a page or a pocket. Ring binders—buy a package of 8- by 11-inch page protectors and treat the ring binders like you would any other album. Drink coasters—punch a hole in them and attach them to each other pearl necklace-style with twine, or ribbon or metal rings. Either cover the coasters with paper or paint them with gesso."

I paused to see how my ideas were going over. My customers were frantically taking notes. The samples I'd put together were being examined with great enthusiasm. Maybe the entire evening wasn't going to be a bust after all.

But how was I going to find that missing recipe? Right then, the front door swung open.

"Don't look now, but the cavalry has finally arrived," said Clancy, and in walked my fiancé, Detective Chad Detweiler.

Editor’s note: Be sure to check out the final installment of this short story in the winter issue of Chicagoland Scrapbooker and on this blog. Can Detective Detweiler figure out who swiped Iona’s family recipe? And can he do it without making all the scrapbookers mad at Kiki? What makes that recipe so fabulous anyway? We have a fabulous red velvet cake recipe to share with you!

Joanna Campbell Slan is the author of the Kiki Lowenstein Mystery Series, featuring a scrapbooking mom. To see a list of all of Joanna’s books and short stories, go to http://tinyurl.com/JoannaSlan. Follow her on Facebook for more great crafting ideas at www.facebook.com/JoannaCampbellSlan.


Friday, June 13, 2014

Miniature Basket Tutorial

This is a fun project that keeps another bit of plastic out of the landfill. Here are two finished versions of this project.


SUPPLIES:


Empty and clean plastic coffee creamer container
Quilling strip (or strip of paper cut 3/8 inch wide)
Duct tape (optional)
Masking tape (cut into half inch pieces)
Scissors
Punch (optional)
Paper to match or contrast with your quilling strip
Beads (optional)

METHOD:

1. Cut the rim off the creamer container.


2. Carefully cut the container into spokes. (Tip: Follow the indentations.) (Note: You could use a permanent marker and color the base of your basket--the creamer container--at this point.)

3. Tape down the quilling strip.


4. Begin to weave it over and under. (Tip: If you have an even number of spokes, skip two at the start of each round. That gives you a nice alternating woven pattern.)


5. Use bits of masking tape to hold down each new quilling strip row. Otherwise the qulling strip will side up, up and away!

6. When you are as high as you want to go, tape down the end of the quilling strip.
7. Stick a piece of duct tape to a cutting mat or a glass surface. Cut it into a thinner strip. (Tip: Use a craft knife and a cork-backed ruler for this.)


8. Peel off the duct tape and wrap it around your basket. Alternatively, glue a quilling strip around the top of the  basket.


9. Decorate your basket with punched shapes and beads.

Ta-dah! Aren't you smart? (I know YOU are!)

Sunday, April 27, 2014

What You Can Do With a Ruined Tee Shirt

I have no idea how my red top wound up in the wash with all my white and cream clothes. None. Worse luck, I added a cup of bleach to the mix and let the whole mess sit for a couple of hours.

Not surprisingly, this cream top picked up a hint of red (much diluted) here and there.

Rit Dye Remover is expensive, and the top was not. However, I'd been wanting to try Zentangle on fabric, so this seemed like a perfect opportunity.

Supplies:

One piece of cardstock
A fabric pen in black

Method:

1. I didn't need to iron my top, because I'd hung it up to dry, but your fabric should be smooth.
2. Slip the card between the fabric layers so the ink doesn't soak through.
3. Choose a steady, flat surface so you don't have any wobble.


4. Start drawing.


5. Stand back and admire. Notice that I chose a very simple pattern. Less is more in my book. But this still needed something.


6. Let sit 24 hours.

7. Wear and collect compliments. (You're such a thrifty Craft-anista!)

Note: I used fabric markers that I bought online. I've been told that you can also use Sharpies. I suggest that after you let the fabric sit for 24 hours, you iron it on the WRONG side to help heat set the ink. Then wash it inside out in cold water.

Okay, anyone willing to try this? Tell me what you're going to rescue by adding a tangle!

Monday, March 17, 2014

How to Make Miniature Mosiacs--Or How to Have Your Egg and Eat It, Too

There are tons of ways to make miniature tiles, usually involving Fimo or paper coated with a thick glossy agent, but I think I've stumbled on a method that's easier and more fun...as long as you're okay with tiles in random shapes. Best of all, it's a way to recycle and upcycle common items.

Behold! (Ha, ha.) A protein snack that recycles into a table with mosaic inlays or a birdbath.


SUPPLIES for the MOSAICS:
A hard-boiled egg. (an old one is best, if it float when it's raw, that's wonderful because that means the inner shell membrane has pulled away from the shell)
In the upper right, you can see some of the various eggshell pieces that I colored. Don't despair if you miss a piece or two! A white "tile" here and there will look cool. In the lower left is a finished mosaic table top. By putting big pieces of shell on the glue and then breaking the big pieces and moving them around, you save yourself a lot of aggravation trying to glue down smaller pieces.
Waxed paper.
Acrylic paints(and brush) or markers.

METHOD:
1. Roll your hard-boiled egg on a surface and gently peel away the shell. Set on the waxed paper.
2. Let the shell dry. Check that the membrane is dry.
3. Color the shell with the marker or paints. A variety of shades will work best.
4. Let dry.

Supplies for the birdbath. You can also see the weird little plastic stand that's supposed to be some sort of a kid's party favor. (Beats me!) Oh, and you can save the lid. Use the foil side as a mirror somewhere else.)
Blogger won't let me edit the caption above, but you'll use the same base as shown there for the mosaic table.

SUPPLIES FOR THE MOSAIC TABLE:
1. Small plastic base. (I used some sort of weird kid's party favor that came in a bag of six or so from the Dollar Store. I have NO idea what a kid is supposed to do with one of these! If you can't find these, you could stack beads or use a wooden turning or a spool from thread or even make something out of Fimo.)
2. Emery board.
3. Round disk. (You can use chipboard, foam, or wood.)
4. Tacky glue.
5. Acrylic paint. (White)
6. Glue spreader. (I like coffee stirrers from Starbucks.)
7. Gold nail polish.
8. Clear nail polish.
9. X-acto Knife
10. Gold trim if desired.

METHOD:

1. Chip off that weird half circle loop on the side of your plastic stand. (Save it. It makes a great handle when painted. I used cuticle clippers to cut mine off.)
2. Sand the stand smooth.
3. Paint the one flat surface of the round disk white.
4. Paint the stand, the other flat surface of your disk and the edge of the disk with gold nail polish. (You will probably need to put on two coats, especially on the plastic. Thin coats work best.) You can add gold trim to the outside edge/rim, if desired. (For example, a thin gold braid or cord.)
5. When all parts are dry, smear thin layer of tacky glue on a quarter of the white side of the disk.
6. With tweezers, pick up some of the eggshells. Push them color side up into the glue.
7. With your X-acto knife, press down. This will break apart the shells. Move the pieces far enough apart that you can add pieces of a different color.
8. Repeat with a different color until surface is covered.
9. Let dry.
10. Paint with a thin layer of clear nail polish. Be careful! If you use too much, the colors might run. You are aiming to put down a coating so this won't happen.
11. Add a thicker layer.
12. Glue the mosaic top to the plastic stand.
13. Admire.

VARIATION FOR BIRDBATH:

ADDITIONAL SUPPLY: Metal jelly or honey tub. (Mine came from a lunch at Cracker Barrel.)

1. Prepare the mosaic tiles as per above.
2. Paint the tub and the stand as per above.
3. Add eggshells as per above, but with this difference--when you get to a curve or an edge, you can put glue on the flat side and glue on the edge, then add a piece of eggshell that OVERLAPS the flat side and smoosh into the edge or curve.
4. Assemble.
5. Admire greatly.

VARIATION FOR SCRAPBOOKERS OR CARDMAKERS:

1. Prepare the mosiacs (colored eggshells) as above.
2. Glue them to chipboard letters or glue them around a mat on a photo.
3. Or glue them to a long strip of paper and use as a decorative border.

This is my FIRST miniatures tutorial. I know it's a little skimpy on the photos, but otherwise, how did I do?

Monday, September 30, 2013

How to Create a Literary Vase

A beautiful fall vase!

I was in St. Louis last week, visiting the Carondolet Branch Library for their Author Breakfast event. On the tables were lovely vases, created by Sarah Zolezzi. As a gift for us authors, we were allowed to take one home. But I walked off and forgot mine! ARGH! At least I took this photo.

Sarah asked library volunteers to bring in their old vases. Here's what I imagine she did next:

* Wash, clean, and dry the vases thoroughly.
* Rip the pages from old, unloved books.
* Cut the pages into strips of various sizes. (You could also tear them.)
* Dip the pages in a bath of tea or coffee. (Just pour old, leftover tea or coffee into a shallow container and dip the pages in.)
* Allow the pages to dry. (This gives them a uniform "old" coloration.)
* Use Mod Podge to adhere them to the vase.

Isn't this clever? I love it!

Monday, September 23, 2013

How to Make Paper Beads, Part II


Now that you have a plethora of long, skinny triangles, it's time to make your beads. For the next step, you'll need:

1.  A lot of wooden toothpicks or skewers. They have to be ROUND, not squarish. These will be used as spindles. You'll wrap your paper beads around the toothpicks to shape them.

2. A block of Styrofoam. As you finish your beads, you will stick the toothpicks into the Styrofoam so that they can rest and cure.

3. Glue. I like Aileen's Tacky Glue. Whatever you choose should dry clear, dry fast, and grip quickly. I've tried glue sticks, but they are too mess. I like to use a coffee stirrer or a toothpick to dip into my glue and use as an applicator.

4. Sealer. Some people use clear nail polish. I prefer Diamond Glaze. I like to apply it with a brush.

Next, I'm going to show you my super-secret, super-duper, extra-special technique tip for making beads. You won't read this anywhere else.


1. Put the large end of the triangle in your mouth and get it moist. Not wet! This will cause your paper to lightly grip the toothpick.
 
 
2. Wrap the triangle around the toothpick. Remember: The big end starts on the toothpick. Try to keep your triangle centered as you wrap it. If it gets off centered nudge it with your fingernail.


3. Dab a bit of glue to the tippy end of the triangle and smoosh it down to glue it to the bulk of the triangle that is now rolled onto your toothpick. You should have a slightly ovoid shape, bigger in the middle and tapered on each end.


4. Stab your toothpick into your Styrofoam block. Admire your garden of beads. Paint the beads with the Diamond Glaze and let them dry. You might want to do two thin coats.
 
 
Now we let them dry!


Monday, August 26, 2013

How to Turn One Plastic Baggy into Three Baggies

Sometimes I don't want to waste an entire plastic baggy on a small amount of stuff. But I still want to separate out my small crafting items. I've learned a simple way to divide one baggy into multiples.

Time it takes:

Shoot, how do I know? (Okay...)
About five minutes or less.

Supplies:

* "ziplock" (press to seal) baggies
* tape (I prefer clear packing tape, but you can also use duct tape or masking tape. The width should be 2 or 3 inches.)
* personal paper trimmer and/or scissors

Method:

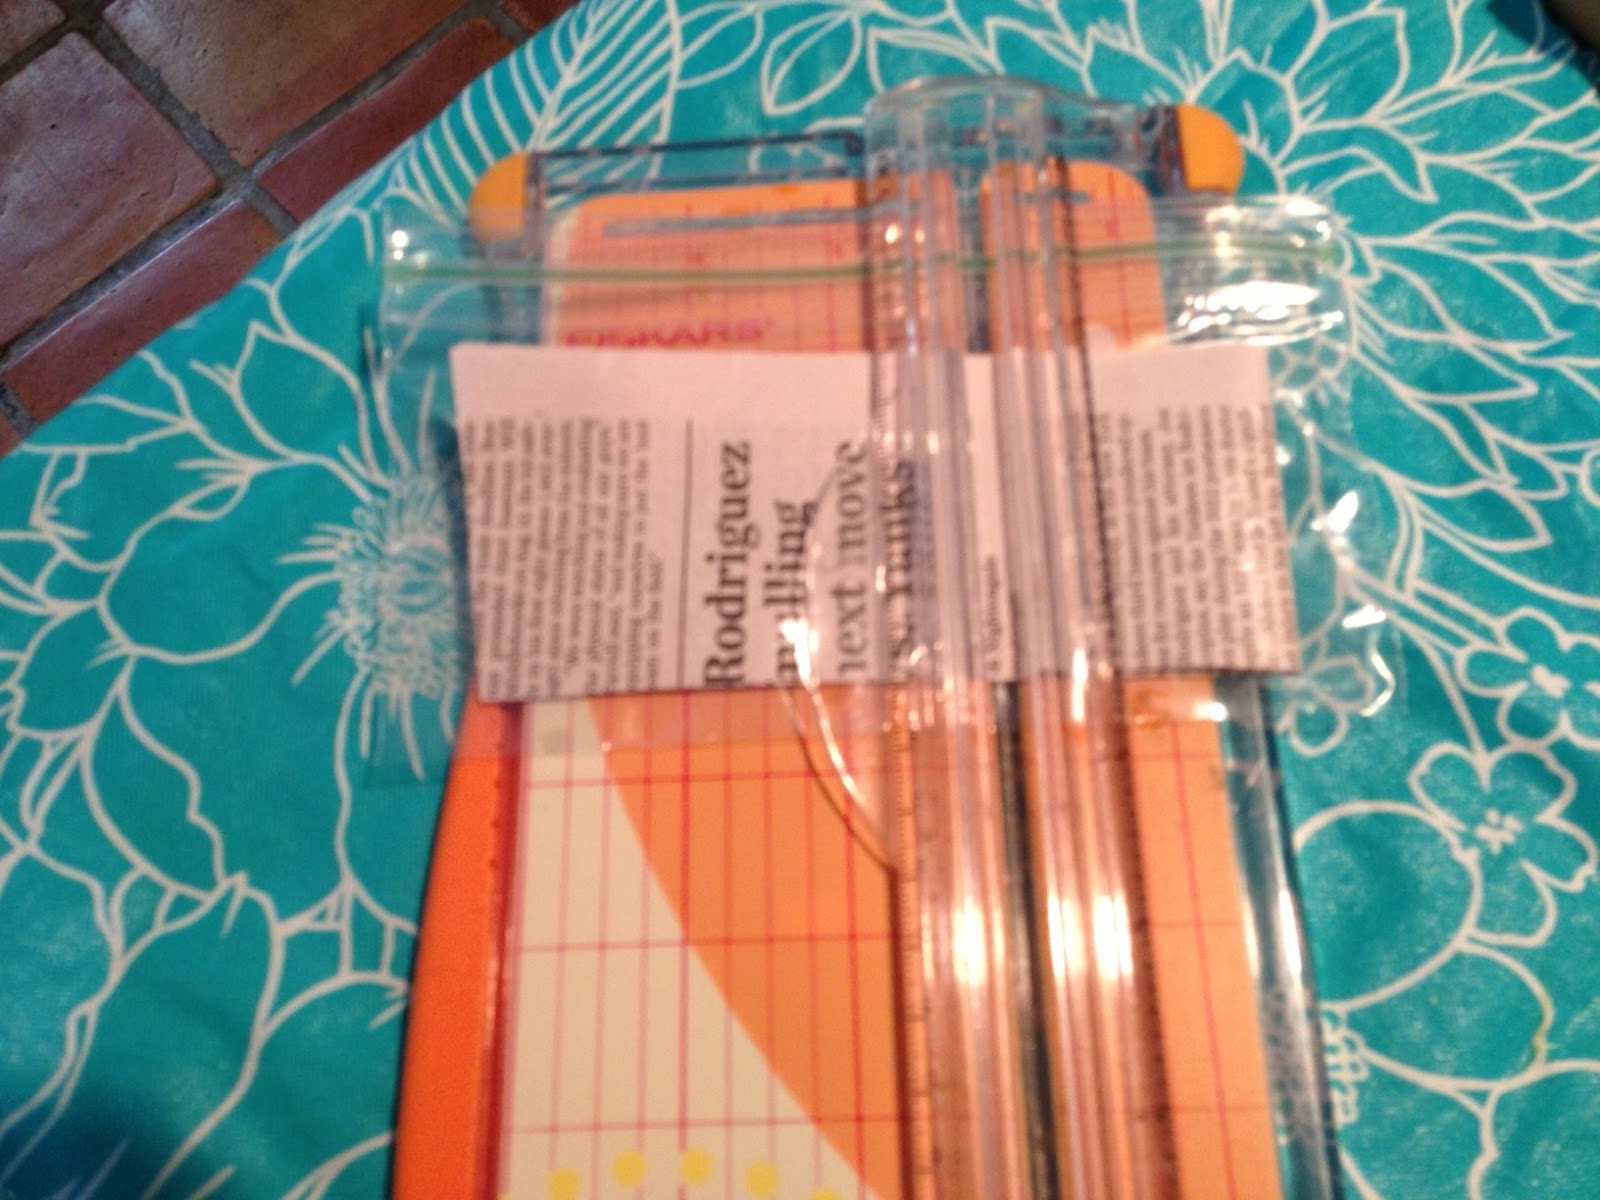
1. Start by flattening out your baggy. I slipped a piece of newspaper into my baggy to make it easier for you to follow what I'm doing. That said, it's MUCH easier to cut your baggy if you insert a piece of newspaper or waste paper as I've done here, because it gives the limp baggy some shape.


2. Now use your Fiskars personal paper trimmer--you do own one, don't you?--and position the bag to cut it. TIP: You will snuggle the top of the bag, with the "zipper," up against the guiding edge of the trimmer. TIP: Start your cut from the "zipper" down, NOT from the thin edge of the baggy up. If you start from the "zipper" down, the rest of the bag won't bunch up. NOTE: You could also use scissors. If you do, be careful!

Note that the green "zipper" is flush against the top edge of the trimmer. 


3. Cut the baggy into two or more smaller baggies. Remember--Take the blade up to the top of the baggy, by the "zipper" and cut down to the thinnest part of the baggy.


4. You'll now have two or three smaller baggies--but their sides aren't sealed! Hey, we can fix that...
Cut pieces of tape as long or longer than your baggy (measuring from the "zipper" to the bottom). Set these aside. You'll need one piece of tape for each open side. So, for three baggies, you'd need four pieces of tape. I used masking tape here so you could see what I was doing.

5. Attach the tape to an open side of a baggy--BUT position the tape so that it's half on the open and half off the open side. See below...

Notice that the tape is half on and half off the open side of the baggy. In other words, if the tape is 3 inches wide, 1 1/2 inches of the tape is stuck to the baggy and 1 1/2 inches is unattached to anything!
6. Flip your small baggy over. Fold the extra overhanging portion of the tape over to seal the other side of the baggy.

7. Press the two sides of the tape together to make sure you get a good seal. If the tape overhangs your new baggy, trim it--but be careful not to cut into the plastic baggy.


The tape is folded over to seal the open edge of the small, new baggy.
8. If you chose to cut the baggy into three smaller baggies, you now have two more baggies to seal up. One (the baggy cut from the middle) will be open on both the right and left sides. Tape both those sides closed.

Here are your three baggies--the one cut from the left, the middle one with two formerly open sides, and the right one (which is flipped over in this photo).

9. And here's the big question...what will you put in your baggies?

On the left, I have plastic "leather" and a seashell, in the middle are bells, and on the right are charms. These baggies were "sealed" with clear packing tape. At the top of the picture, you can see the baggies I made and "sealed" with masking tape. I prefer the clear tape because the entire bag is then see-through.


So tell me, what's in your baggy?

Sally and I want to know!

How cute is this? Two emery boards in the package, but we LOVE the graphics most of all


We'll send these darling emery boards to the person with the coolest answer! 

You have until Sunday September 1 at midnight to answer...and we'll post the winner on Monday!

Sunday, February 24, 2013

You're Going to Love 'Beachcomber Art'

Being an author means, you constantly question yourself. "Is this the right idea? Or should I have chosen another topic?" There's no way to tell if you are working on something really cool...or if you picked a lemon. And your confidence suffers accordingly.

I'd had a bad, sad couple of days where my doubts got the better of me, when the Universe decided to send me a sign. A detour on the highway took me right past Debbie Brookes' charming shop
 "Beachcomber Art,"

http://beachcomberart.com/

I walked through the front door, took one look at the kitchsy mermaid with her shell bodice, and told Debbie, "I'm in love!"


Debbie's art is EXACTLY the sort of work that I had envisioned for my new heroine.


"I use nature's timeless elements to create art that reaffirms beauty and individuality," she says. Here she is next to an old screen door that she re-purposed by adding a mirror and a cross-section of seashells.


She started with decorative boxes for her friends. See the two above? Note the amazing cluster of shells on top.


And moved to a variety of home decor items, such as this chest, mirror and the candlesticks.


Along the way, her sense of whimsy played into her pieces, as with her fish. (Be sure to click on the photos so you can see them as larger images.)


Her light fixtures are simply divine, especially this one with seaglass.

Now my heroine will also do work that's much more simple. I plan for her to share projects that anyone can tackle at home. In addition, she'll be an avid DIY (Do It Yourself) type that loves to hunt for flea market bargains and turn them into treasures. In fact, that's the name of my new series: The Trash to Treasure Mystery Series. It's about a woman whose life is trashed, but who turns "lemons into lemonade" and winds up creating treasures.

I'd love to hear your feedback!