Joanna Campbell Slan has moved, searching new blog...

Showing posts with label tutorial. Show all posts

Monday, September 23, 2013

How to Make Paper Beads, Part II


Now that you have a plethora of long, skinny triangles, it's time to make your beads. For the next step, you'll need:

1.  A lot of wooden toothpicks or skewers. They have to be ROUND, not squarish. These will be used as spindles. You'll wrap your paper beads around the toothpicks to shape them.

2. A block of Styrofoam. As you finish your beads, you will stick the toothpicks into the Styrofoam so that they can rest and cure.

3. Glue. I like Aileen's Tacky Glue. Whatever you choose should dry clear, dry fast, and grip quickly. I've tried glue sticks, but they are too mess. I like to use a coffee stirrer or a toothpick to dip into my glue and use as an applicator.

4. Sealer. Some people use clear nail polish. I prefer Diamond Glaze. I like to apply it with a brush.

Next, I'm going to show you my super-secret, super-duper, extra-special technique tip for making beads. You won't read this anywhere else.


1. Put the large end of the triangle in your mouth and get it moist. Not wet! This will cause your paper to lightly grip the toothpick.
 
 
2. Wrap the triangle around the toothpick. Remember: The big end starts on the toothpick. Try to keep your triangle centered as you wrap it. If it gets off centered nudge it with your fingernail.


3. Dab a bit of glue to the tippy end of the triangle and smoosh it down to glue it to the bulk of the triangle that is now rolled onto your toothpick. You should have a slightly ovoid shape, bigger in the middle and tapered on each end.


4. Stab your toothpick into your Styrofoam block. Admire your garden of beads. Paint the beads with the Diamond Glaze and let them dry. You might want to do two thin coats.
 
 
Now we let them dry!


Monday, September 9, 2013

How to Create Inchies -- and What to Do With Them When You're Done!

In my newest Kiki Lowenstein short story, she runs short of craft supplies and ideas. But Kiki never fails her customers, so she came up with a wonderful "make and take" project--inchies!

Inchies are one inch by one inch pieces of original art. Typically they are collage art, but that's not always the case. What's so wonderful about inchies? Making them will...

  • Stretch your creative muscle,
  • Use up odd scraps of paper, 
  • Encourage you to try new color combinations
  • Supply you with an endless source of cool embellishments!


Kiki Lowenstein’s Inchies


This is such a fun project because you literally cannot do it wrong! Best of all, it’s a thrifty way to use up those small bits of paper that you hate to toss. When you’re done, there are tons of cool products that can be used in a variety of places on your cards or scrapbook pages. You can even trade inchies with your friends. And yet another benefit…inchies force you out of your crafting comfort zone. Think of them as an exercise to strengthen your creativity muscle.


Supplies:


Thin cardstock—flattened cereal boxes or old file folders work best

Trash—pages of magazines, bits of scrapbook paper, foil from candies, snippets of ribbon, pieces of cardstock

Embellishments—faux gems, glitter, sequins (if you like sparkle, that is)

A variety of glues, especially one that dries clear

A ruler and a pencil

Scissors

Inks and rubber stamps

A sanding block (if you use a cardboard box with slick printing on one side


Method:

1.    Turn the cardstock over to the blank side. Draw a grid in pencil. Make the squares 1” by 1”.  (Tip: Want an easy way to draw a grid? Use your Fiskars Personal Paper Trimmer as a guide!)


2.    Flip the cardstock over. Sand off the shiny print on the "right" side. (Tip: Wear an apron as this gets messy.) You don’t have to sand off every bit of the slick print, but do scratch up the surface so that the glue will stick more easily.


3.    Start by gluing down a magazine page and then glue pieces of paper on top of it randomly. (Tip #1: Glue down small bits of ribbon or netting. Cut out words and glue them down. Tip #2: This is a great place to use negative spaces left by punches! Tip #3: Kiki likes using her small punches to create tiny shapes. These she places on the surface randomly. Tip #4: A pair of tweezers and a craft knife are helpful for manipulating the tiny pieces of paper.)


4.    Keep adding until you like what you have. You can also ink the design and/or rubber stamp on top.


5.    Cover the piece with Mod Podge and let the piece dry.


6.    Once it's really, really dry, turn it over and cut it into one inch squares. Or leave it in larger sections if so desired. Remember, the guidelines you drew are for your convenience. You can do whatever you wish with your inchies.


7.    Be sure to sign the backs of your miniature pieces of art!


What to do with your inchies:


1.    Add them to greeting cards as miniature pieces of art.

2.    Use them as you would any scrapbook embellishment.

3.    Trade them with your friends.

4.    Line them up along the bottom of a scrapbook page for a border.
 
Okay, what do you think of Kiki's inchies?


Monday, August 26, 2013

How to Turn One Plastic Baggy into Three Baggies

Sometimes I don't want to waste an entire plastic baggy on a small amount of stuff. But I still want to separate out my small crafting items. I've learned a simple way to divide one baggy into multiples.

Time it takes:

Shoot, how do I know? (Okay...)
About five minutes or less.

Supplies:

* "ziplock" (press to seal) baggies
* tape (I prefer clear packing tape, but you can also use duct tape or masking tape. The width should be 2 or 3 inches.)
* personal paper trimmer and/or scissors

Method:

1. Start by flattening out your baggy. I slipped a piece of newspaper into my baggy to make it easier for you to follow what I'm doing. That said, it's MUCH easier to cut your baggy if you insert a piece of newspaper or waste paper as I've done here, because it gives the limp baggy some shape.


2. Now use your Fiskars personal paper trimmer--you do own one, don't you?--and position the bag to cut it. TIP: You will snuggle the top of the bag, with the "zipper," up against the guiding edge of the trimmer. TIP: Start your cut from the "zipper" down, NOT from the thin edge of the baggy up. If you start from the "zipper" down, the rest of the bag won't bunch up. NOTE: You could also use scissors. If you do, be careful!
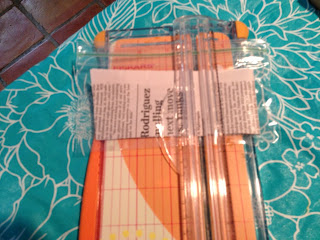
Note that the green "zipper" is flush against the top edge of the trimmer. 


3. Cut the baggy into two or more smaller baggies. Remember--Take the blade up to the top of the baggy, by the "zipper" and cut down to the thinnest part of the baggy.


4. You'll now have two or three smaller baggies--but their sides aren't sealed! Hey, we can fix that...
Cut pieces of tape as long or longer than your baggy (measuring from the "zipper" to the bottom). Set these aside. You'll need one piece of tape for each open side. So, for three baggies, you'd need four pieces of tape. I used masking tape here so you could see what I was doing.

5. Attach the tape to an open side of a baggy--BUT position the tape so that it's half on the open and half off the open side. See below...

Notice that the tape is half on and half off the open side of the baggy. In other words, if the tape is 3 inches wide, 1 1/2 inches of the tape is stuck to the baggy and 1 1/2 inches is unattached to anything!
6. Flip your small baggy over. Fold the extra overhanging portion of the tape over to seal the other side of the baggy.

7. Press the two sides of the tape together to make sure you get a good seal. If the tape overhangs your new baggy, trim it--but be careful not to cut into the plastic baggy.


The tape is folded over to seal the open edge of the small, new baggy.
8. If you chose to cut the baggy into three smaller baggies, you now have two more baggies to seal up. One (the baggy cut from the middle) will be open on both the right and left sides. Tape both those sides closed.

Here are your three baggies--the one cut from the left, the middle one with two formerly open sides, and the right one (which is flipped over in this photo).

9. And here's the big question...what will you put in your baggies?

On the left, I have plastic "leather" and a seashell, in the middle are bells, and on the right are charms. These baggies were "sealed" with clear packing tape. At the top of the picture, you can see the baggies I made and "sealed" with masking tape. I prefer the clear tape because the entire bag is then see-through.


So tell me, what's in your baggy?

Sally and I want to know!

How cute is this? Two emery boards in the package, but we LOVE the graphics most of all


We'll send these darling emery boards to the person with the coolest answer! 

You have until Sunday September 1 at midnight to answer...and we'll post the winner on Monday!