

This was also inspired by the wonderful tutorial by Lesley Shepherd. I urge you to check it out before you start this project. http://miniatures.about.com/od/miniatureprojects/ss/arustictble.htm
SUPPLIES:
Bendable twigs (I got mine from an Australian pine tree) in a variety of sizes (six, eight, and ten inches?)
Twigs of all sizes
Pine needles, dried (ditto that Australian pine) (or craft grasses or floral wire)
Cardstock (old cereal boxes are great)
Clothespins or clips
Wood glue or Elmers glue
Tacky glue (quick drying)
Waxed paper
Pencil
Black marker (a Sharpie)
Craft knife
Glass jar (2" across the lid. I used a 3 oz. jar of capers. Probably a glass Coke bottle would work, too.)
A pot to boil water in (I keep an old pot for crafting. Don't use it to eat out of later!)
Balsa wood, cut to 3" by 1 1/2" by 3/8" (This will be the seat of your bench)
Floral wires (Three or four. The plain uncolored type is best.T
Brown and black paint or markers
Hedge clippers or sturdy scissors
Tongs
METHOD:
1. Choose four small twigs to be legs for your bench. These should be roughly the same size. Set these aside. Tip: If they aren't the same length, use the hedge clippers or scissors on them. You can also sand them down to the right length. Mine are about 1 3/4" long.
2. Bend your longer twigs so that one end touches the left and one touches the right of your piece of balsa wood. The twigs should NOT break but it might not want to bend to this shape easily. That's okay. We're going to help it along.
3. "Drill' holes on the left and right to hold the ends of the twig. I used the tip of my X-acto knife and turn it around and around to "drill" the holes.

2. Fill your pot with water and start it boiling. Take it off the stove and put your twigs in the water. After about a five minute soak, use your tongs to retrieve them. Bend them around the jar. Clip the two ends of each twig together with clothespins and let them sit for an hour or so.

3. Use your piece of balsa as a pattern and trace it onto the cereal box. Cut out the rectangle. Draw an X in the middle of the rectangle, to delineate four triangles. Number the triangles 1, 2, 3, and 4. Cut them out. Using the balsa as a pattern, mark the holes with your Sharpie. Punch out holes in the cardstock to match where you have the holes in the balsa.

Learn From My Mistake or LFMM (because I make a lot of mistakes!): You'll notice that I marked the triangles on the plain, unprinted side of the cereal box--and then I covered those markings with pine needles. DUH! Mark the printed side of the box, not the plain side. (In other words, do the opposite of what I'm showing you above.) You'll use the plain, brown, unprinted side to glue your pine needles on!)
LFMM Draw an arrow showing you which way to point your pine needles. They should all point in, towards the center of your seat. This arrow will go on the plain side of the box, as I've shown you below. If you don't do this, you can get confused. Your pattern won't come out right.
4. Using the wood glue, start gluing pine needles onto the triangles. Keep the needles straight and next to each other as you go. They will hang over the edge of your pattern. No biggie!
LFMM (Remember that acronym! I'll use it a lot!) Don't spread the glue all over the triangle. Instead, make a stripe of glue about a quarter of an inch wide. Work one stripe at a time. This will give you more control.
LFMM Cut the pine needles into shorter pieces, about two inches long. They naturally have a curve. By cutting them, you don't have to deal with the curve.
LFMM To corral these little suckers, and to get them to line up neatly, use the tip of your X-acto knife or a plastic credit card.
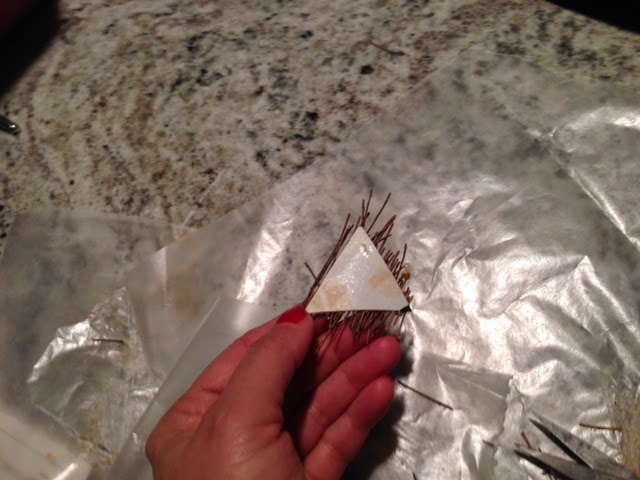
5. Wrap the triangles in a piece of waxed paper. make a sandwich of them. Put something flat on them to help them dry properly. Alternatively, you could use two pieces of heavy plastic (like from a take out container) and pinch it together with clothes pins to help the triangles to dry flat. You might also want to add a little more glue to the top of the triangles. But not too much or the glue will show a lot.

6. Neatly trim the excess pine needles. Use your scissors.
7. If the bent wood is dry enough, you can unclip it. (You'll be amazed at the wonderful bend you'll get!) Size one piece to be the primary bent back for your bench. Test it and put it in the holes. Trim it with the hedge clippers or scissors if necessary. Insert into the holes, add glue, and use a bit of masking tape to hold them in place until they dry.

8. Using paint or markers, color your floral wire brown-black. Let it dry.
9. Reassemble the four triangles that make up the seat for your bench. (You're going to be so happy about those numbers on the back. They'll really help!) Adjust holes for the bent twig back of the bench. If you are happy with how it looks, glue the triangles onto the bench seat, the balsa wood. Trim around the seat with longer pieces of pine needles. See the photo below? I used a bit of masking tape to keep the longer pine needles down as they dried on the trim.
LFMM Lesley Shepherd used longer "pine needles" (she bought craft grasses) and first set down an X in the middle of her seat. Then she added the triangles. This made the whole thing look more finished.

10. Add another bent twig back. This one will be larger than the first. Glue the ends of it next to the ends of the first bent twig back.
LFMM You might want to make a tiny notch in the bench seat for the new twig back. It'll help keep the twig stable.
11. Wrap wire between the two bent twig backs.
12. Add spindles made of more twigs to the back.
13. At this point, you're basically done. You can add "arms" by trimming another bent twig and gluing to to one of the backs and to the seat. You can also add spindles between the legs, wrapping them with wire, if so desired.

Don't forget to admire your work. What a clever, clever crafter you are!
If you have any questions, just put them in the comments section below or email me at JCSlan@JoannaSlan.com
2 comments:
Super instructions. Thank you so much.
You are entirely welcome!
Post a Comment