
Time it takes:
Shoot, how do I know? (Okay...)
About five minutes or less.
Supplies:
* "ziplock" (press to seal) baggies
* tape (I prefer clear packing tape, but you can also use duct tape or masking tape. The width should be 2 or 3 inches.)
* personal paper trimmer and/or scissors
Method:
1. Start by flattening out your baggy. I slipped a piece of newspaper into my baggy to make it easier for you to follow what I'm doing. That said, it's MUCH easier to cut your baggy if you insert a piece of newspaper or waste paper as I've done here, because it gives the limp baggy some shape.

2. Now use your Fiskars personal paper trimmer--you do own one, don't you?--and position the bag to cut it. TIP: You will snuggle the top of the bag, with the "zipper," up against the guiding edge of the trimmer. TIP: Start your cut from the "zipper" down, NOT from the thin edge of the baggy up. If you start from the "zipper" down, the rest of the bag won't bunch up. NOTE: You could also use scissors. If you do, be careful!
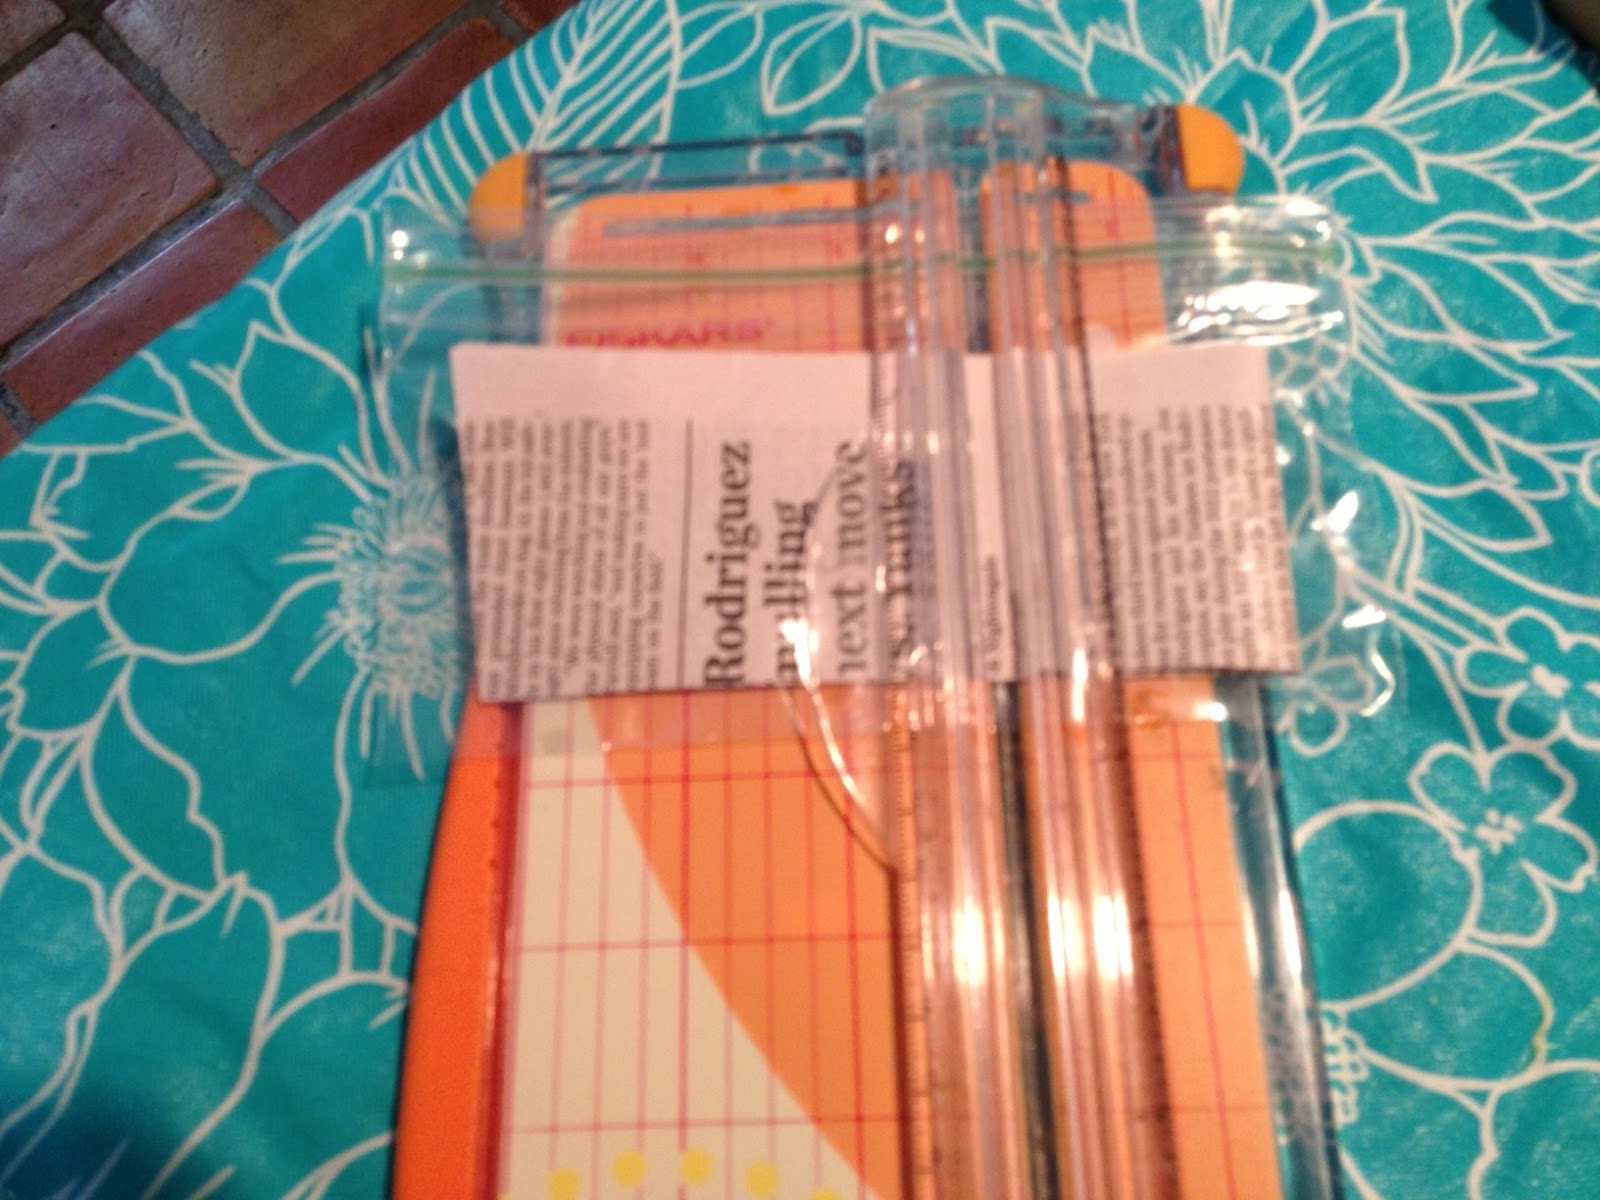 |
| Note that the green "zipper" is flush against the top edge of the trimmer. |
3. Cut the baggy into two or more smaller baggies. Remember--Take the blade up to the top of the baggy, by the "zipper" and cut down to the thinnest part of the baggy.

4. You'll now have two or three smaller baggies--but their sides aren't sealed! Hey, we can fix that...
Cut pieces of tape as long or longer than your baggy (measuring from the "zipper" to the bottom). Set these aside. You'll need one piece of tape for each open side. So, for three baggies, you'd need four pieces of tape. I used masking tape here so you could see what I was doing.
5. Attach the tape to an open side of a baggy--BUT position the tape so that it's half on the open and half off the open side. See below...
 |
| Notice that the tape is half on and half off the open side of the baggy. In other words, if the tape is 3 inches wide, 1 1/2 inches of the tape is stuck to the baggy and 1 1/2 inches is unattached to anything! |

 |
| The tape is folded over to seal the open edge of the small, new baggy. |
 |
| Here are your three baggies--the one cut from the left, the middle one with two formerly open sides, and the right one (which is flipped over in this photo). |
9. And here's the big question...what will you put in your baggies?
 |
| On the left, I have plastic "leather" and a seashell, in the middle are bells, and on the right are charms. These baggies were "sealed" with clear packing tape. At the top of the picture, you can see the baggies I made and "sealed" with masking tape. I prefer the clear tape because the entire bag is then see-through. |
So tell me, what's in your baggy?
Sally and I want to know!
 |
| How cute is this? Two emery boards in the package, but we LOVE the graphics most of all |
We'll send these darling emery boards to the person with the coolest answer!
You have until Sunday September 1 at midnight to answer...and we'll post the winner on Monday!
5 comments:
My baggies would contain unique and special small toys for my grandson who would use them in the car seat. What a treasure trove of goodies for him to amuse himself with. His farm animals, his matchbox cars and his treats.
these baggies are adorable and perfect for my pens and notepads which I use daily.
Good idea, traveler!
Hey, petite, yes! This would work for pens and pencils that get ink on stuff.
I'm putting DMC floss in mine! This is perfect for organizing the floss for my cross-stitch project! I'm going to punch a hole thru the taped (stronger) side near the "zip" end, then run a big binder ring thru the holes to hold my bagged floss together. So much more cost effective than buying the expensive store-brand baggies designed for this purpose. Thanks, Joanna!
Post a Comment