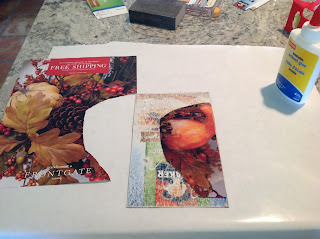
Inchies are one inch by one inch pieces of original art. Typically they are collage art, but that's not always the case. What's so wonderful about inchies? Making them will...
- Stretch your creative muscle,
- Use up odd scraps of paper,
- Encourage you to try new color combinations
- Supply you with an endless source of cool embellishments!
Kiki
Lowenstein’s Inchies
This
is such a fun project because you literally cannot do it wrong! Best of all,
it’s a thrifty way to use up those small bits of paper that you hate to toss.
When you’re done, there are tons of cool products that can be used in a variety
of places on your cards or scrapbook pages. You can even trade inchies with
your friends. And yet another benefit…inchies force you out of your crafting
comfort zone. Think of them as an exercise to strengthen your creativity
muscle.
Supplies:
Thin
cardstock—flattened cereal boxes or old file folders work best
Trash—pages
of magazines, bits of scrapbook paper, foil from candies, snippets of ribbon,
pieces of cardstock
Embellishments—faux
gems, glitter, sequins (if you like sparkle, that is)
A
variety of glues, especially one that dries clear
A
ruler and a pencil
Scissors
Inks
and rubber stamps
A
sanding block (if you use a cardboard box with slick printing on one side
Method:
1. Turn
the cardstock over to the blank side. Draw a grid in pencil. Make the squares
1” by 1”. (Tip: Want an easy way to draw a grid? Use your Fiskars Personal Paper Trimmer as a guide!)
2. Flip
the cardstock over. Sand off the shiny print on the "right" side. (Tip: Wear an apron as this gets
messy.) You don’t have to sand off every bit of the slick print, but do scratch
up the surface so that the glue will stick more easily.
3. Start by gluing down a magazine page and then glue pieces of paper on top of it randomly. (Tip #1: Glue down
small bits of ribbon or netting. Cut out words and glue them down. Tip #2: This is a great place to use negative spaces left by punches! Tip #3: Kiki likes using her small punches to create tiny shapes. These she places on the surface randomly. Tip #4: A pair of tweezers and a craft knife are helpful for manipulating the tiny pieces of paper.)
4. Keep
adding until you like what you have. You can also ink the design and/or rubber
stamp on top.
5. Cover the piece with Mod Podge and let
the piece dry.
6. Once it's really, really dry, turn
it over and cut it into one inch squares. Or leave it in larger sections if so desired. Remember, the guidelines you drew are for your convenience. You can do whatever you wish with your inchies.
7. Be
sure to sign the backs of your miniature pieces of art!
What to do with your inchies:
1. Add
them to greeting cards as miniature pieces of art.
2. Use
them as you would any scrapbook embellishment.
3. Trade
them with your friends.
4. Line
them up along the bottom of a scrapbook page for a border.
Okay, what do you think of Kiki's inchies?


.jpg)
8 comments:
Cool idea. Darn! I just threw out two cereal boxes too.
Has the garbage person come? I say, go Dumpster diving!
Awesome! My grandkids will love this. I'm printing the directions right now.
Terrie, it's fun, easy, and the results are fantastic! How can you lose?
I have participated in several inchie and twinchie(2inch)swaps online.
Some amazing work possible.
Thank you for sharing x
Nice. I may try this.
Suzy, I bet you were amazed by the artistry in the swaps. Sounds like fun.
Dru Ann, go for it! Why not? If you don't like the end result, it's not like you've lost a big investment.
Post a Comment